
How To Make Corn Husk Dolls
Where corn was grown as a crop, children, in both Native American and Colonial American families, used husks to fashion dolls. Follow these simple instructions and refer to the accompanying diagrams to create your own unique doll.
Materials Needed:
string scissors a bucket of water bags of cornhusks- most easily purchased (dried, cleaned and in uniform sizes) at a local craft store cornhusk doll diagram page (print out)Directions
****Before beginning, soak cornhusks in a bucket of water until they are soft and pliable.****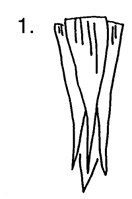 |
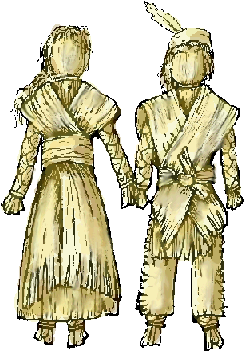
Take four cornhusks and arrange them in as shown. |
 |
Using a small piece of string, tie the straight ends together tightly. |
 |
Trim and round the edges with scissors. |
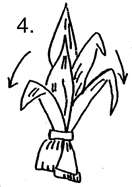 |
Turn upside down and pull long ends of husks down over the trimmed edges. |
 |
Tie with string to form the "head." |
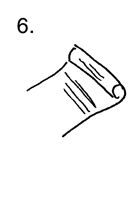 |
Take another husk, flatten it, and roll into a tight cylinder. |
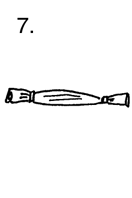 |
Tie each end with string. This forms the doll’s arms. |
 |
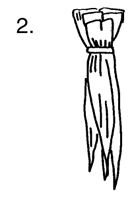
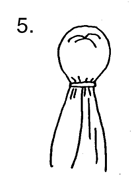
Fit the arms inside of the long husks, just below the "neck." |
 |
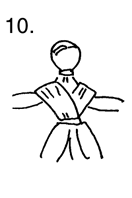
Tie with string, as shown, to form a "waist." |
 |
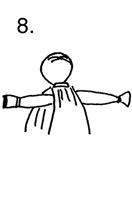
Drape a husk around the arms and upper body in a criss-cross pattern to form "shoulders." |
 |
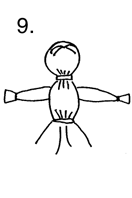
Take
four or five husks, straight edges together, and arrange around waist. These form a "skirt" for the doll. |
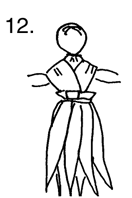 |
Tie with string. |
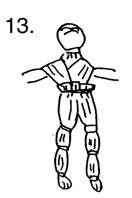 |
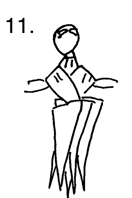
If desired, follow the diagram to form legs for the doll. Tie legs with small strips of husks as indicated. Finish off the doll by tying small strips of husk around the neck and waist to hide the string. Small scraps of cloth may be used to dress the doll. |